

Duly inspired by getata and Ian G's "MCS Intake Screen" mod pics and how-to's, I took advantage of an off-day and tried it myself. I've posted this write up along with "lessons learned" for future modders...
DIY MCS Intake Screen/Air Scoop Grill
Difficulty Rating: Easy
Est. Cost: $3.00
Est. Time: 1 hour
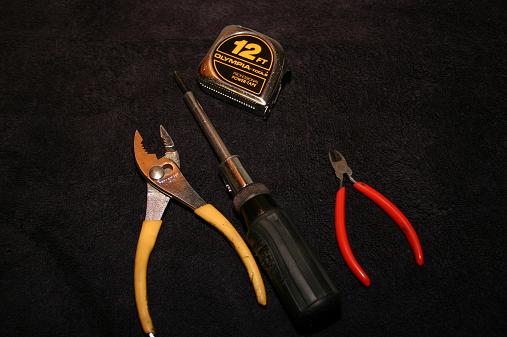
Supplies & Tools Needed:
Gutter Guard Screen or Vent Screen (15"x 3" or more*)
Tape Measure
Pliers (or 10mm socket)
Phillips screwdriver
Wire cutters or "snips"
[fig 01]
1. I went to the local Home Depot just to find they stopped carrying the gutter guard screens! Ack! I improvised and picked up a 16"x6" vent screen from the Heating & Air section, (which actually nets 14.5" x 4.5" of useable screen material). Note: the hood scoop hole is 14.75" x 1.75", so you know what that means!*...

[fig 02]
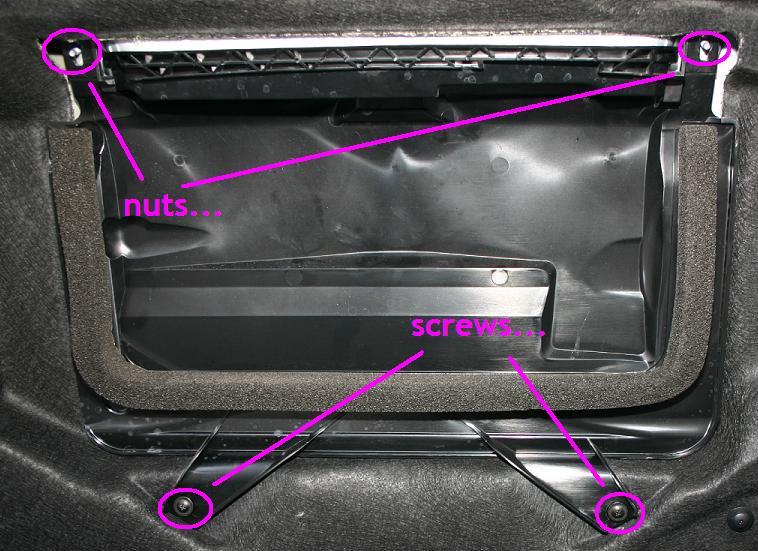
2. I removed the (black, plastic) interior of the hood scoop from under the hood. My 06 MCS only had two (10mm) nuts to remove, and two screws...
 [fig 03]
In this pic you can see what the hood/hood scoop looks like w/o the interior piece...

[fig. 04, 05]
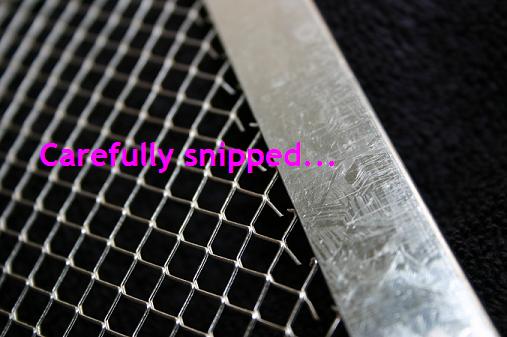
3. I carefully began snipping the wire mesh from the vent frame. This took about 10-15 minutes. If you can find the gutter guard material you won't have to do this step. If you have to do this step, just be patient and snip carefully...
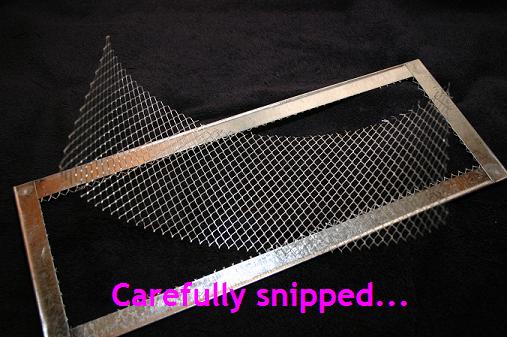
[fig. 06,07]
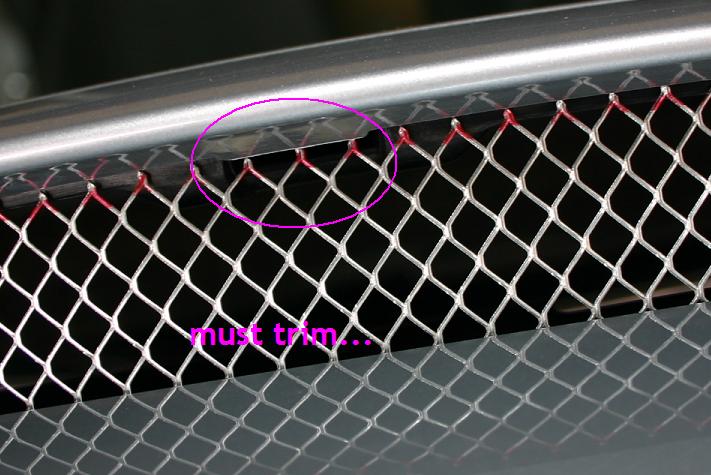
4. I didn't make a template like I've read, but chose to "eyeball it" by laying the wire mesh on top of the scoop. I aligned the bottom of the wire mesh onto the bottom ridge, and marked along the upper ridge with a red whiteboard marker...
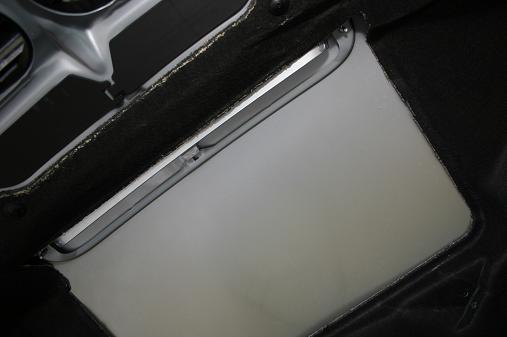
In this pic you can see the "ridge" the screen must fit into...


[fig. 08, 09]


[fig. 10,11]
5. I proceeded to cut out the screen accordingly. It's better to cut on the outside of the marking than on the inside, because you can always trim down later...


[fig. 12,13]
6. In this pic you can see that the screen is slightly larger than the scoop hole, which worked out to my advantage- Since the screen is so flexible I was able to pop it in without it falling out. Now to see how it fits!...

[fig. 14]
7. I put the plastic hood scoop interior back into place but didn't tighten all the screws. Here you can (sort of) see where the top center doesn't fit securely because this is where a piece of the exterior scoop wants to snap into the interior. I removed the plastic hood scoop interior and screen, eyeballed the change, and trimmed this little piece out...
 [fig 15]
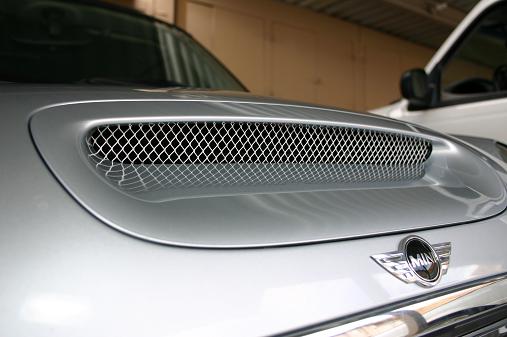
8. I put everything back together w/ the screen sandwiched between the exterior and interior scoop pieces. Result, yet another DIY Intake screen!

[fig. 16,17]
*From the photos you'll see that the screen is actually a smidge too small! For $2.49+tax, this works for now. I may decide to paint it black or just make another one out of the left over material, or try again with some better material.
What would I do differently?
1. I would measure the intake hole before going shopping!
2. I would probably shop around for better material
3. I would make a template and upload it for anyone to use
This project inspired by:
getata (http://www.northamericanmotoring.com/forums/showthread.php?t=73812)
Ian G (http://www.tech-esq.com/MINI/how_to_build_a_air_scoop_grille.htm)
and
Blair of West Coast MINIs, who emailed me a written step-by-step (no pics) and encouraged me to try it myself!
:BMP:

No comments:
Post a Comment