Showing posts with label mods. Show all posts

Friday, May 16, 2008

AC Schnitzer's 226-hp MINI Cooper Clubman S

AC Schnitzer does have a pretty good reputation at tuning MINIs. So I don't know why I didn't think I was going to be as excited about AC Schnitzer's tuned MINI Cooper Clubman S as I was.

Some specs:

  • 226-hp
  • 17 or 18-inch alloy wheels
  • spoiler treatments
  • diesel option(s)

And it looks, oh so sweet!


photos borrowed from egmcartech.com

The price? Well, if you have to ask... (€ 39.035)

Read the full story at egmcartech.com

Sunday, April 06, 2008

iPhone+MINI Cooper Armrest

Found this cool video and thread on NAM about the iPhone "snap-in" for the MINI OEM armrest.

Wednesday, February 27, 2008

Boyd Coddington Dead at 63

[Ed. note: Man, this news breaks my heart, and I haven't even been into cars long enough to truly understand!]

[autoweek.com] Boyd Coddington, the hot-rod innovator whose creations won the coveted Grand National Roadster Show's America's Most Beautiful Roadster (AMBR) trophy a record seven times, died Wednesday morning after a lengthy hospital stay. He was 63.

Photo courtesy viewimages.com

"It is my firm belief that Boyd is the founding father of this street-rod movement," said Gary Meadors of the Goodguys. "From the Boyd cars to the Boyd billet aluminum wheels . . . that whole smooth look that he brought to street rodding is what set him apart. He took our hobby to a whole other level with all the exposure he got in media outside our world. He was a forerunner, and he will be missed."
Get the full story at Autoweek.com

Thursday, October 25, 2007

How To: Rear Badge Removal [PICS]

In a fit of boredom inspiration, I decided to remove the rear badging from my beloved MINI (To take photos of the process was an afterthought. Sorry for the crappy cellphone quality).


The rear badge we know and love...

Step One: Tape off with Painter's Tape (optional but recommended)...

Dental Floss (The cheap kind. Don't use this.)

Step Two: Floss Gently.


Trivia: Floss goes through fingernails better than double-sided tape...

The process continues...

Badge Removed. But you're not done yet!...

The aftermath... Rear Badge, preserved for future use; and about 3 feet of (cheap) dental floss...

Back to work on the tape... Don't use this! (duh)

Plastic scraper from "goo-gone" kit. Better? (note the question mark)

Step Three: Wet & Scrape, repeat as needed...


Looking good! (but only because you can't see the scratches left behind! Grrrr!)...

Step Four: Cut & Polish... (this did not remove the scratches completely!) :(


Wax on, wax off... (Meguiar's NXT Tech Wax, not shown)

The result:


Estimated time: 15-30 minutes.


Supplies used:
  • Blue Painter's Tape
  • Dental Floss
  • Goo-gone® kit (liquid & scraper)
  • Meguiar's Speed Glaze + applicator
  • Meguiar's NXT Tech Wax (not shown) + microfiber
Tips I learned: If you have all the correct supplies BEFORE you begin, you can probably crank it out in about 15 minutes.

Things I wish I knew before I started: How the heck do you remove the double-sided tape remnants without leaving scratches?

Saturday, July 14, 2007

Now I'm feeling You-i-fied! "MODS GONE WILD". The Complete List*

*I couldn't settle on a title for this post, so you get all three!


Yesterday was my MINI's first birthday.

While not really a major milestone, it did cause me to reflect back on the fun and excitement we've shared so far. Then I remembered: That is the main purpose of the "BUSHFINGER MINI" blog in the first place! I decided to create this little "modifications timeline" for posterity's sake (and a little time-killin' too). This also serves as a tribute of sorts, to all of the wonderful dealers and vendors out there that make owning and "you-i-fying" a MINI Cooper, so damn fun! And so it begins:

Thursday, July 13, 2006
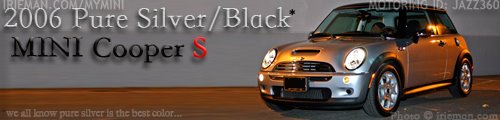
I picked up "Mr. Biggleworth" from the dealer. It had 11 miles on it. And chrome side view mirrors. I specifically said black, yo! (Two week later, I went back to the dealer and swapped them out from a new MINI straight across. Does that count as a mod?)

What came with the car:
MINI Aux Input
MINI Chrome Exhaust Tips
MINI Grill Badge Holder
MINI Outdoor Car Cover
That little scuff-guard thing for the boot

Installed within the first week:
Alta Stubby Antenna (from my previous MINI)
MINI Magnetic Stone Guards (from my previous MINI)
LoJack (ordered with the car, installed a week later)
Tinted Windows from The Tint Factory (Loma Linda, Ca.)


July 06:

DIY MCS Intake Screen/Air Scoop Grill
Mini-Mania Ultrik Cold Air Intake. Who puts in a CAI at ~700 miles? Well, it was free.


Aug 06:

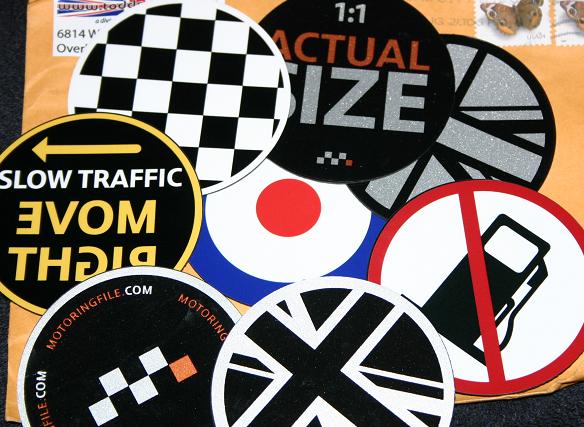
(Finally took the MINI Outdoor Car Cover out of the box.)
A slew of Grill Badges by MotoringBadges.com
MINIEyes by Rouge Minis
Spy Toggle Cover from MINIUSA.COM (the first hint of the "Spy Car")


Oct. 06:

TomTom GO300 GPS Navigation Device
New Wheels/Tires (sort of): I already had a set of Toyo Proxies TPT 205/50R16 and ICW Racing Wheels from my previous MINI. It just took 4 months to put them on.


Nov. 06:

Unplanned mod: The infamous "curb incident"


Dec. 06:

Limited Edition Front License Plate Holder by Blair Butler (yo- you cain't even git dis yo!)


Feb. 07:

Leather Knee Pad by MyMINIparts (now minspeed.com)
Sylvania SilverStar Turn Signal Bulbs
H-Sport 19mm "Sport" Rear Swaybar
Honeycomb supercharger scoop insert by ImagoX


March 07:

Chrome Expressions 808 Titanium Silver with Machined Lip
Alta 15% Version 2.0 Supercharger Pulley (Installed at AMVIV!)


April 07:

Escort Passort 8500 x50
Pirelli P6 205/50R16


May 07:

M7 Strut Brace (originally Purchased at AMVIV, just now installed!)


June 07:
MINI hits it's first 10,000 miles. (Not a mod, but an interesting milestone nonetheless!)

And that's just the first year!
Geepers, what's left?! I'm sure I've forgotten something. I'll update this entry as these come to mind.

:bmp:

Friday, July 13, 2007

Today is my MINI's birthday!

Exactly one year ago today, I took delivery of my 2006 MINI Cooper S, a.k.a. "Mr. Bigglesworth". It was about this hot too, a blazing 100-degree , SoCal summer day.

I remember being frustrated that his "maiden voyage" was on the HMS Gridlock. A brand new MINI, and I'm going 20 mph in clutch killer traffic for the next two hours trying to get home.

I remember stalling it three times in three different intersections. Pesky traffic signals! (I don't think I've mastered it's tiny-but-mighty transmission yet!) I got home and had to take a nap because I was tired from baking in the heat. I couldn't sleep w/ a brand new MINI in my parking spot.

Later that evening I was able to get some "First Day" photos, even though it was at night. Less than a month later the mod-bug creeped in and bit me in the ass. Since then, I've attempted to chronicle its on-going transformation. (Note to self: Get photo morphing program)


then:
now:
(not necc. the best recent pic, but hey...)


One year and a 11,000 (s)miles later, I love my MINI as much as the day I brought it home. More actually, thanks to those darn kids!

:)

Monday, May 28, 2007

Lookie What I Got! M7 Strut Tower Brace


Way back at AMVIV, (wow- that seems soo long ago!) I acquired the ever popular M7 Strut Tower Brace. I didn't get it installed at the time because our good friends from Detroit Tuned were astute enough to point out a cracked strut mount thingy! A quick replacement (and a few sledge-wacks later) and... voila!


(Q: How do you get a good, clear shot of a Strut Bar?)


Yes- I know my engine bay needs a detailing day

I like that when you get the M7 Strut Brace you automatically get the Strut Tower Reinforcement Plates too!

M7 Strut Brace (MSRP): $199.00
(Strut Tower "Caps" compliments of "Monty")
"

Monday, April 09, 2007

Car Electronic Device Hard Wire

Our friend Molly from NAM and fiascofarm.com posted a great writeup on hard-wiring an electric device into your MINI vehicle!


Gee... now why would I need to know this info?!?! *wink*

Thanks Molly! :b:

Friday, March 16, 2007

Lookie What I Got! Honeycomb Supercharger Scoop Insert

I know when I've been one-upped. Sometimes I don't care- especially when *I* benefit from it too! Take for example, when ImagoX (NAM) one-upped my Intake Screen with his more aesthetic Honeycomb version (gotta love it any time you can deface Dodge RAM parts)!


Tuesday, March 06, 2007

FS: Brand New H-Sport "Sport" (27mm) Front Sway Bar (and OEM Rear Sway Bar, too!)

As the title states, this is a brand spankin' new H-Sport "Sport" (27mm) Front Sway Bar for '02 and up MINI Cooper. Hardly even breathed on, this was taken out of box only to take these photos.

Two-position adjustable, w/ Bushings, Zerk Fittings, 1/2 tube of 'loob'
Retail price: $176.00
Shipped: $100 + plus shipping (O.B.O.)


"...Perfect for aggressive canyon carving and track day events while not being too aggressive for every day street driving..."

Here's the link to the Manufacturer's official description:
http://www.h-sport.com/cgi-bin/EDCstore.pl?user_action=detail&catalogno=22800F

Click here for larger photos


Also for sale,
OEM MCS Rear Sway Bar w/ bushings. (great as an MC upgrade or MCS replacement!) Less than ~5000 miles of use- practically new!

Retail: ???
Shipped: $50 plus shipping (O.B.O.) Click here for larger photos


I accept: Paypal, M.O., Checks*, well-hidden cash
*delivered upon clearance

Sunday, February 25, 2007

Lookie What I Got! H-Sport Rear Sway Bar!

Well, I can't really show photos of my latest accoutrement, since it's under the car, in between the frame and subframe, in the rear, connected to end-links and control arms. And I was actually involved in the (free) install (thats right- i actually got my hands dirty!) So I wasn't able to take 100 photos of the process. :)

The H-SPort Sport (19mm) Rear Sway Bar
"Does it make a diffference?" you say? I left the driveway, turned left, and at 20mph I could already notice a difference in handling. I wouldn't necessarily say a "stiffer" ride, since it's not a more rough ride. I can say that I don't know why they call it a "sway-bar", when it's actually and anti-sway bar!

(from the website):
"Recommended for street and track use, the Sport Rear may be used in combination with the stock front bar. All three settings on the Sport Rear are very useful if you attend track days, yet the bar itself is perfectly suitable for daily street use without any harsh ride effects of a larger bar."


Good times!


H-Sport.com


Update: I just noticed that there is a great review of this exact item on MotoringFile.com! (silly me for not checking first!)

Friday, February 09, 2007

Lookie What I Got! - Clear* Turn-Signal Bulbs

A couple days ago I took a look at my car and all of a sudden, the "fried-egg" front turn signals now bug the heck out of me!

This morning I decided today was the day I was going to do something about it. I checked NAM for insight. Lots of info, but not quite enough. I found a link to the perfect bulbs but didn't want to have to order anything. I didn't know if the "mod" was simple. The corresponding NAM thread provided some decent instructions- enough to motivate to go ahead do it. I went the to AutoZone website to see they had something in stock- but, no photo? (C'mon retailers- we want photos!)

I don't really like my local AutoZone so I went to Kragen instead. For once, Kragen didn't have what I was looking for, and AutoZone did (usually it's the other way around). So instead of ordering the $25 silver covered bulbs from bimmian.com, I got some "close-enoughs" for... $12! No shipping or waiting!
Popping them in was pretty simple. When the lights are on you can't tell the difference. When they're off- well, not exactly "clear", but much better than distracting orange "accents" . If I had known this was so simple I'd have done it months ago!

I wished there were better instructions on NAM so I wrote up my own:

The $12 bulbs I got from AutoZone: Sylvania "Silverstar" Part No. 1156A ST (edit: The actual part number is 7507AST, but those weren't in stock so I improvised)


Here's what it looks like in the box (there's only one bulb in this photo because I fitted the first one in the AutoZone parking lot).


Here's the back of the box.


Pop the hood bonnet and find the housing holder. This shot is the left signal, while leaning over the bumper looking into the hole. To remove- 1) turn it, 2) pull it! So simple for skinny-handed folks lke myself!

Here's the bulb in it's holder. Remove the OEM bulb. Also simple!

Replace it with the new bulb. Note: the pins on the side of the OEM are offset at 150-degrees. The pegs on the Sylvania are at 180. In other words, they don't match up precisely to the bulb holder- a little "dedication" and it fits right in. This shouldn't be an issue if you can secure the proper part.


Replace the bulb housing the same way you took it out- turn it til it locks into place.

Here's a before and after with the lights off:


Here's a before and after with the lights on:


*Not exactly "clear", there is almost no noticeable difference with the lights on. $12 and 10 minutes later, I'm a happy camper!

northamericanmotoring.com
bimmian.com
autozone.com
Sylvania "Silverstar" Part No. 1156A ST, 7507AST